Schedule Automated Database Backups with JokoWipe
Set up a serverless backup agent and configure automated PostgreSQL backups in under 5 minutes — no infrastructure required.
📋 Before You Start
Before you begin, make sure you have:
- ✓ A JokoWipe account — sign up free at jokowipe.id
- ✓ A publicly accessible database (Neon, Supabase, Aiven, AWS RDS, or any PostgreSQL host)
- ✓ Your database connection credentials (host, port, user, password)
Step 1: Open the Agents Page
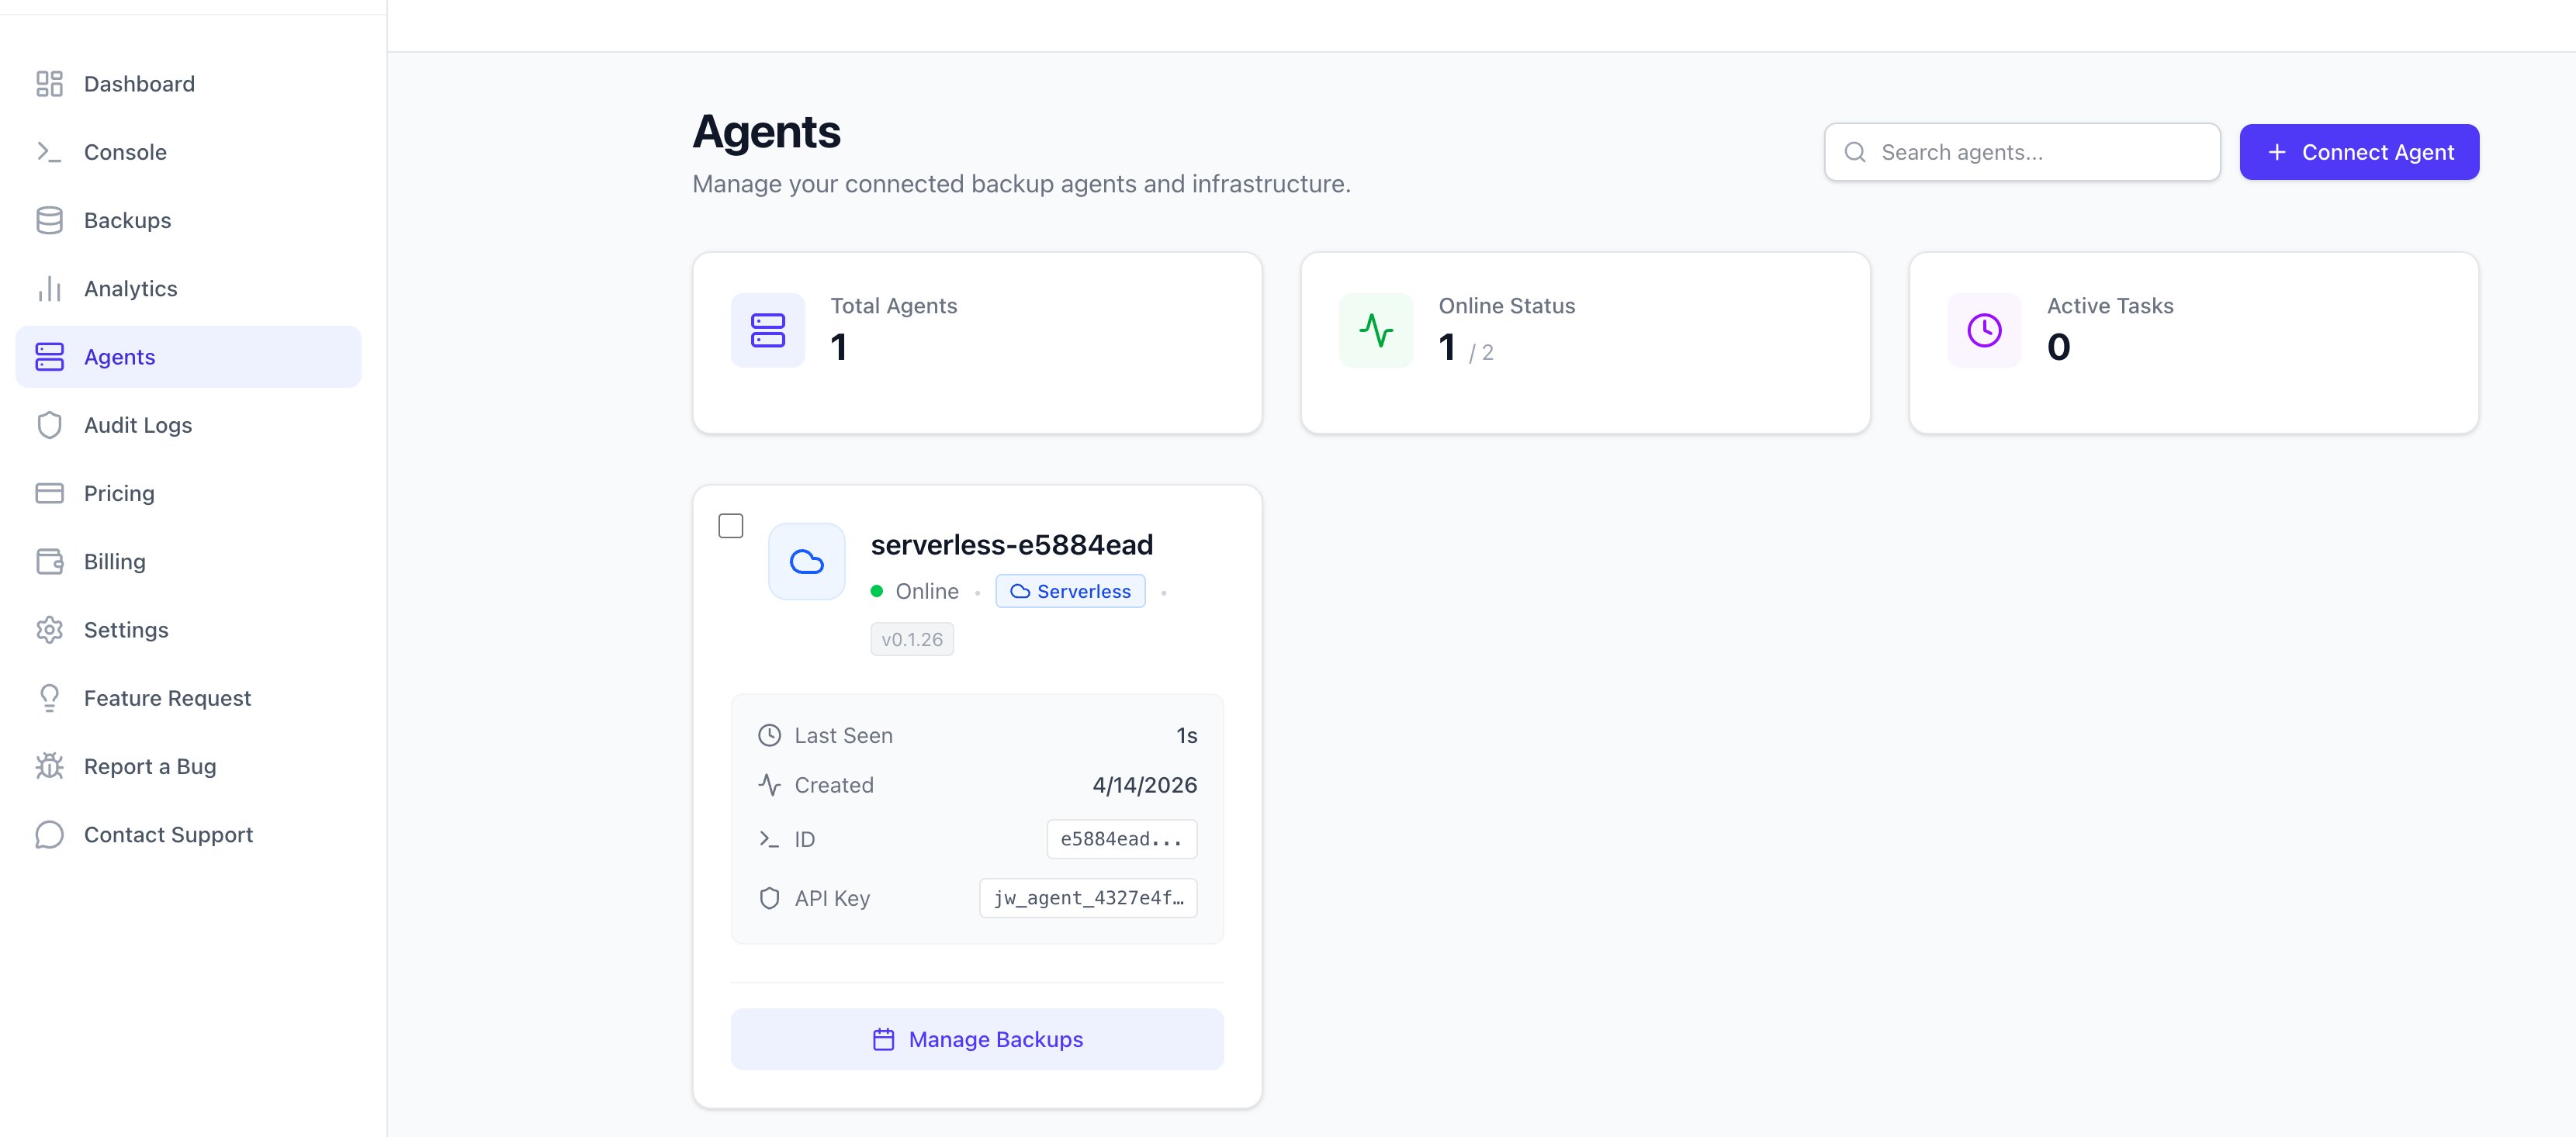
Navigate to the Agents page from the sidebar. This is where you manage all your backup agents and infrastructure. Click the + Connect Agent button in the top-right corner.
Step 2: Choose Serverless Agent
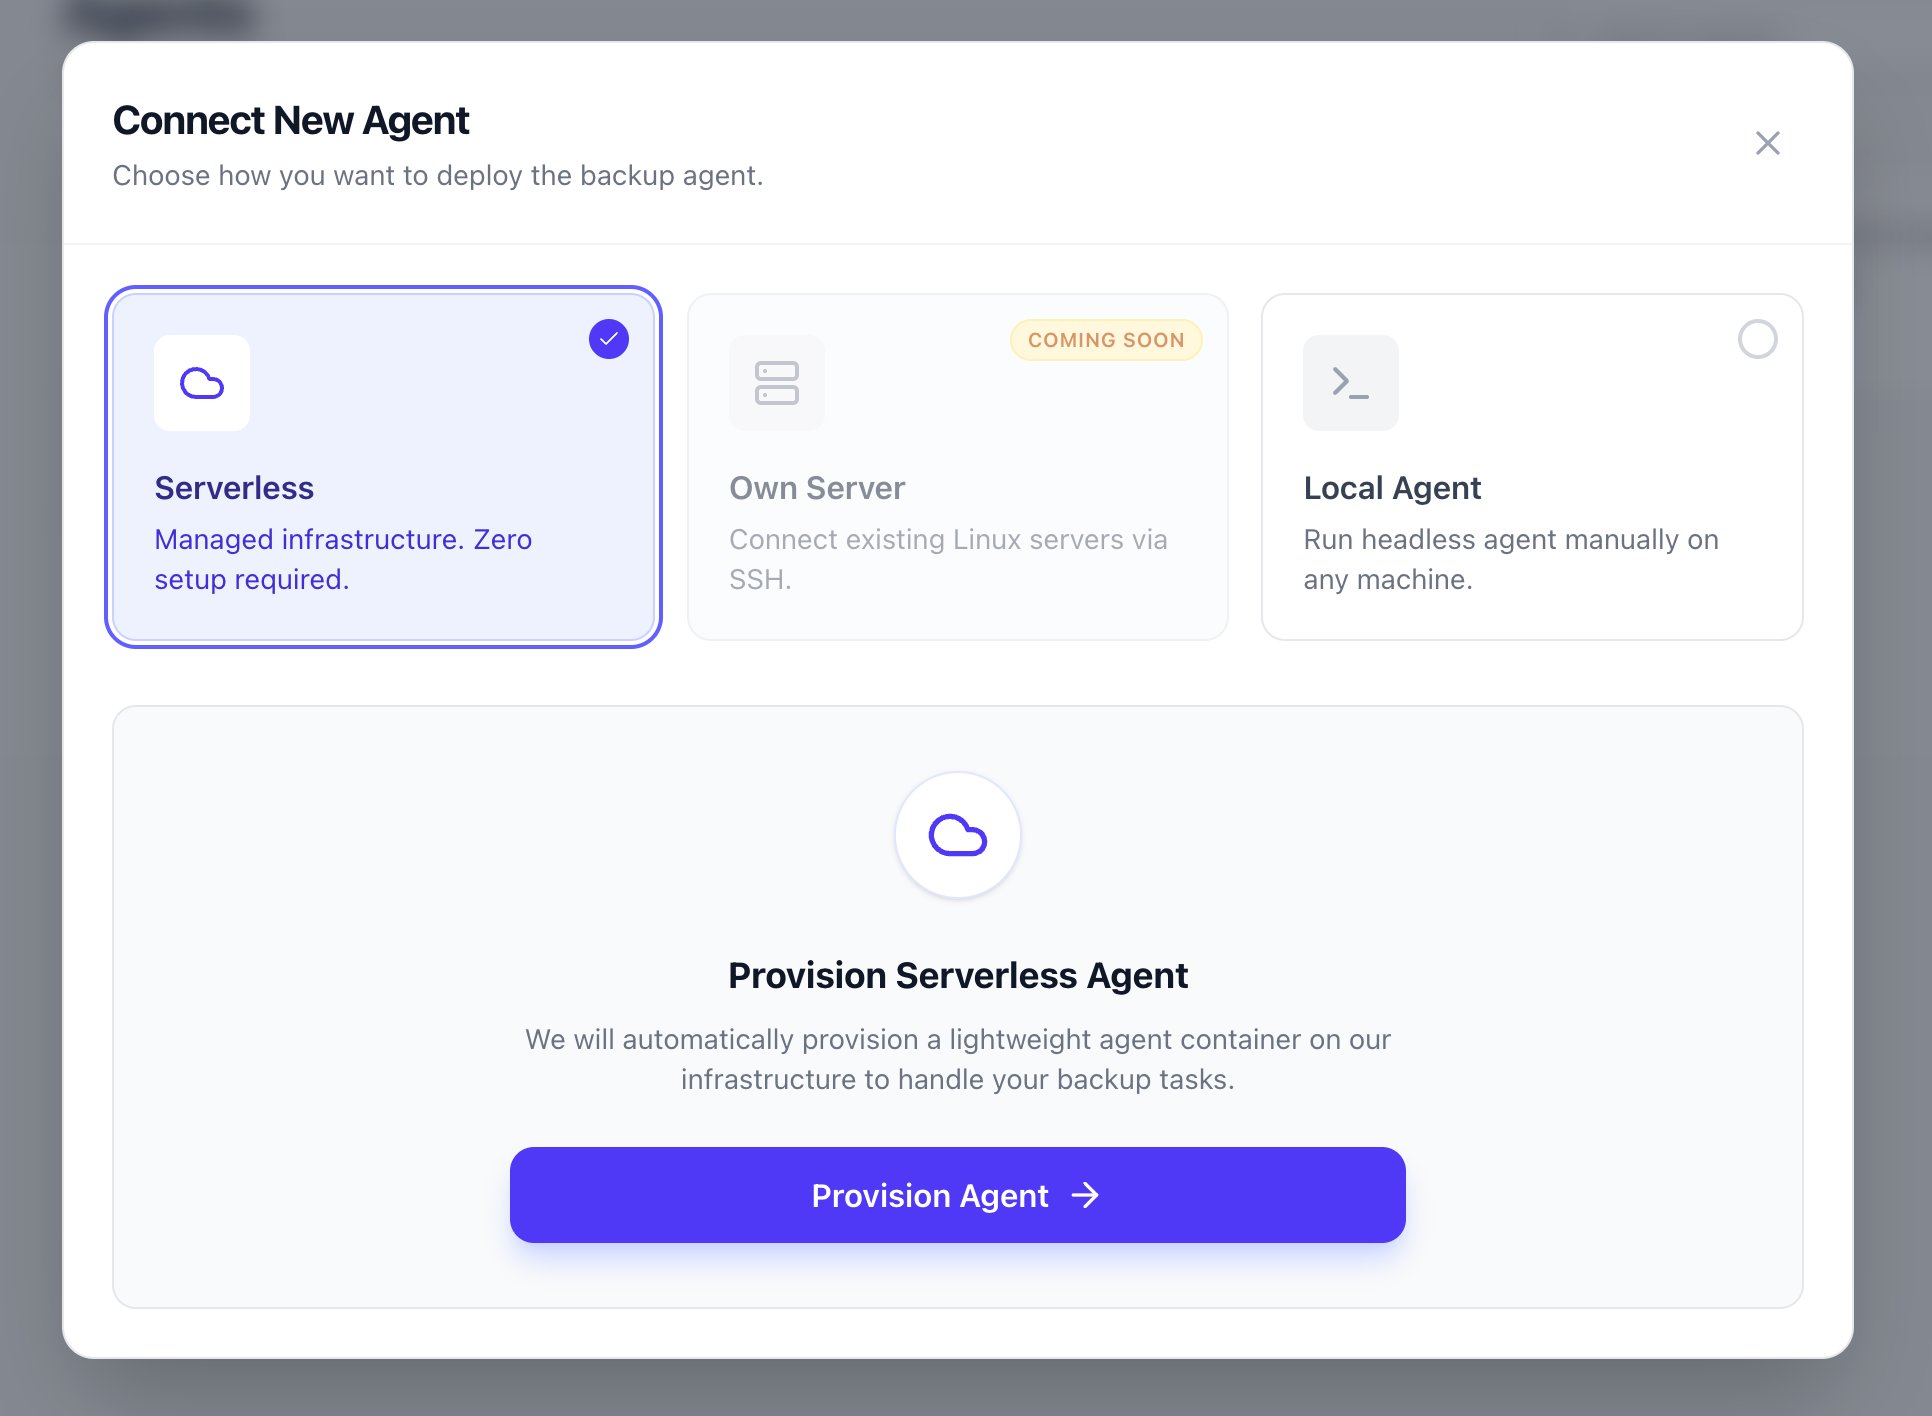
In the Connect New Agent modal, select Serverless — this gives you managed infrastructure with zero setup. Then click Provision Agent.
💡 Tip: Serverless agents are fully managed by JokoWipe. No server setup or SSH configuration needed — perfect for getting started quickly.
Step 3: Verify Agent is Online
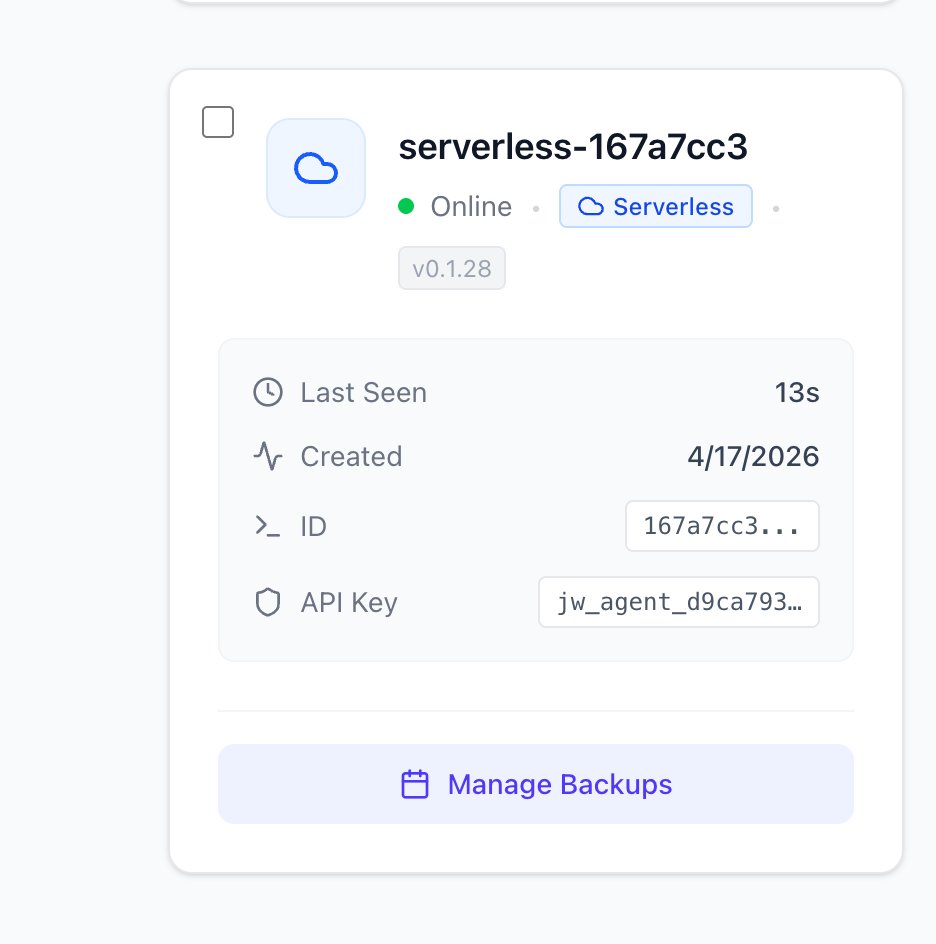
After provisioning, you'll see a success message with your agent's ID. Close the modal and return to the Agents page. Within about 30 seconds, your new agent should appear with an Online status indicator (green dot).
✅ Agent provisioning started!
ID: 167a7cc3-80ba-46b0-ad7d-b48a39983561
It will appear online within ~30 seconds.
Step 4: Create a New Backup Job
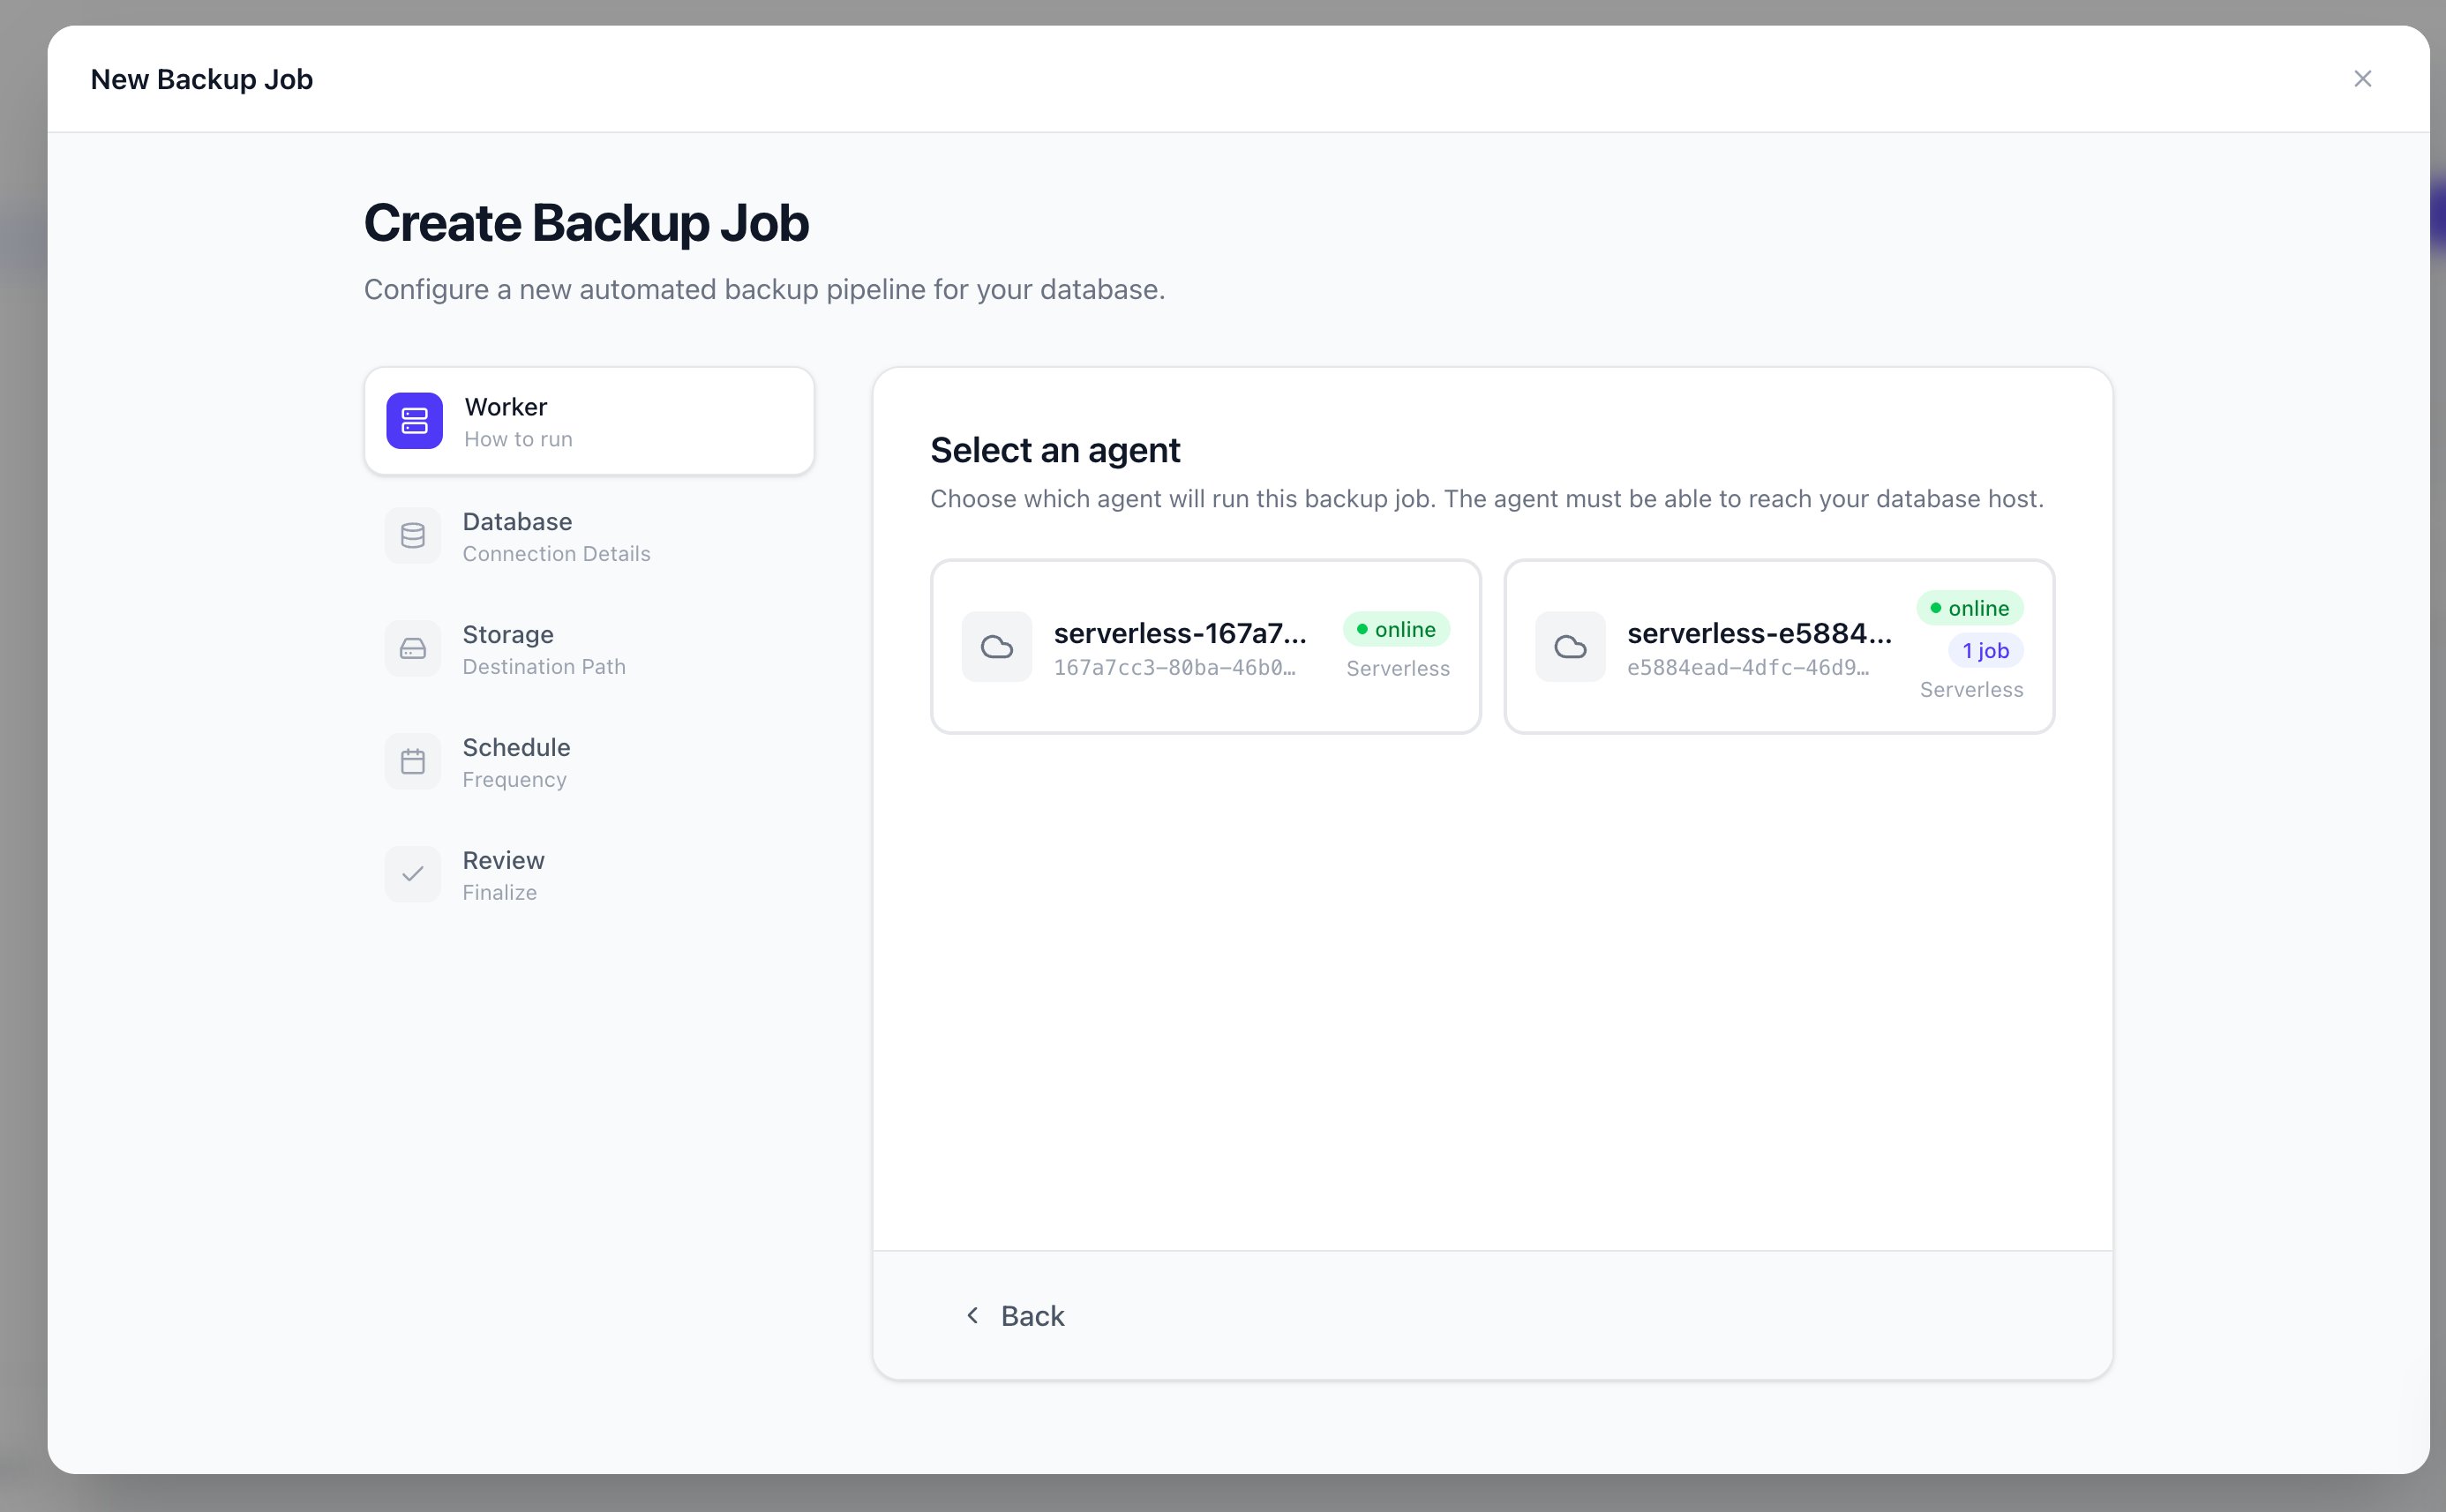
Go to the Backups page (click Manage Backups on the agent card, or navigate via the sidebar). Click New Backup Job, then select the agent you just provisioned.
Step 5: Configure Database Connection
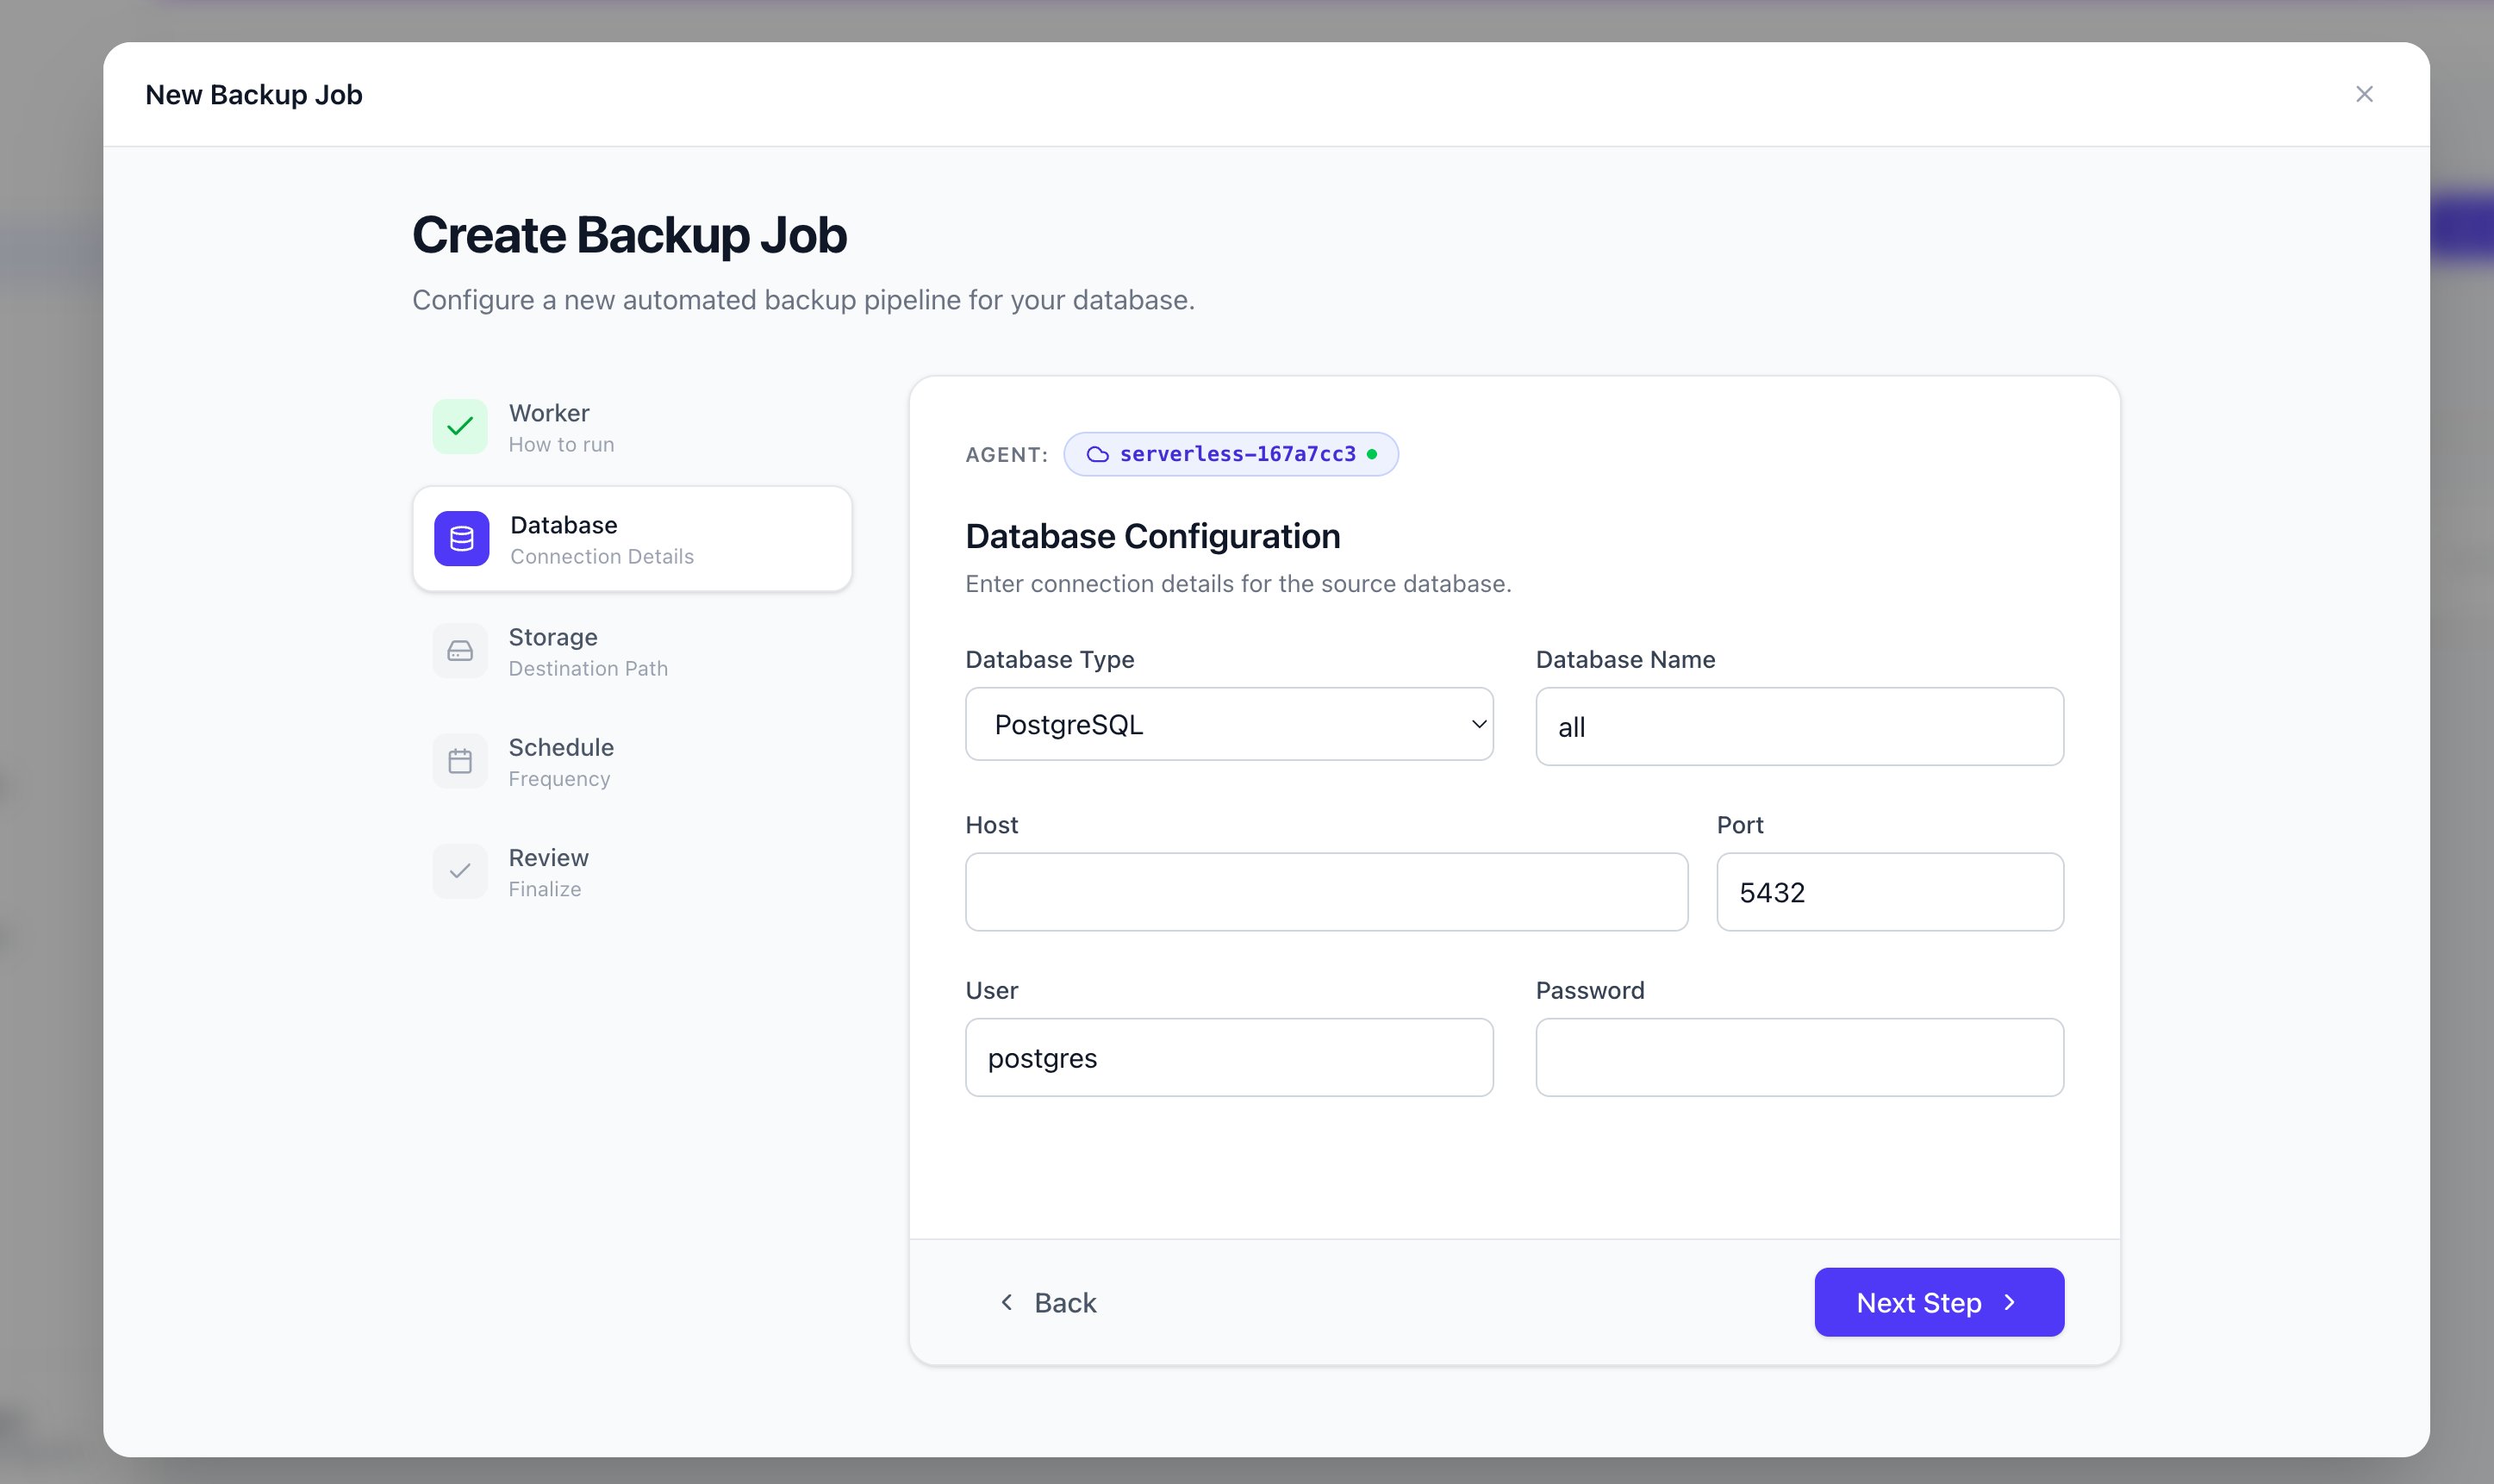
Enter your database connection details. Select the correct Database Type from the dropdown — options include PostgreSQL, MySQL, MariaDB, MongoDB, Redis, and managed services like Neon, Supabase, and AWS RDS.
Fill in your Host, Port, Database Name, User, and Password. The serverless agent will validate your credentials by pinging the database before proceeding.
⚠️ Important: Make sure you pick the correct database engine. For Neon, select Neon or PostgreSQL. If the agent can't reach your database, double-check that your host is publicly accessible and your credentials are correct.
Step 6: Select Storage Destination
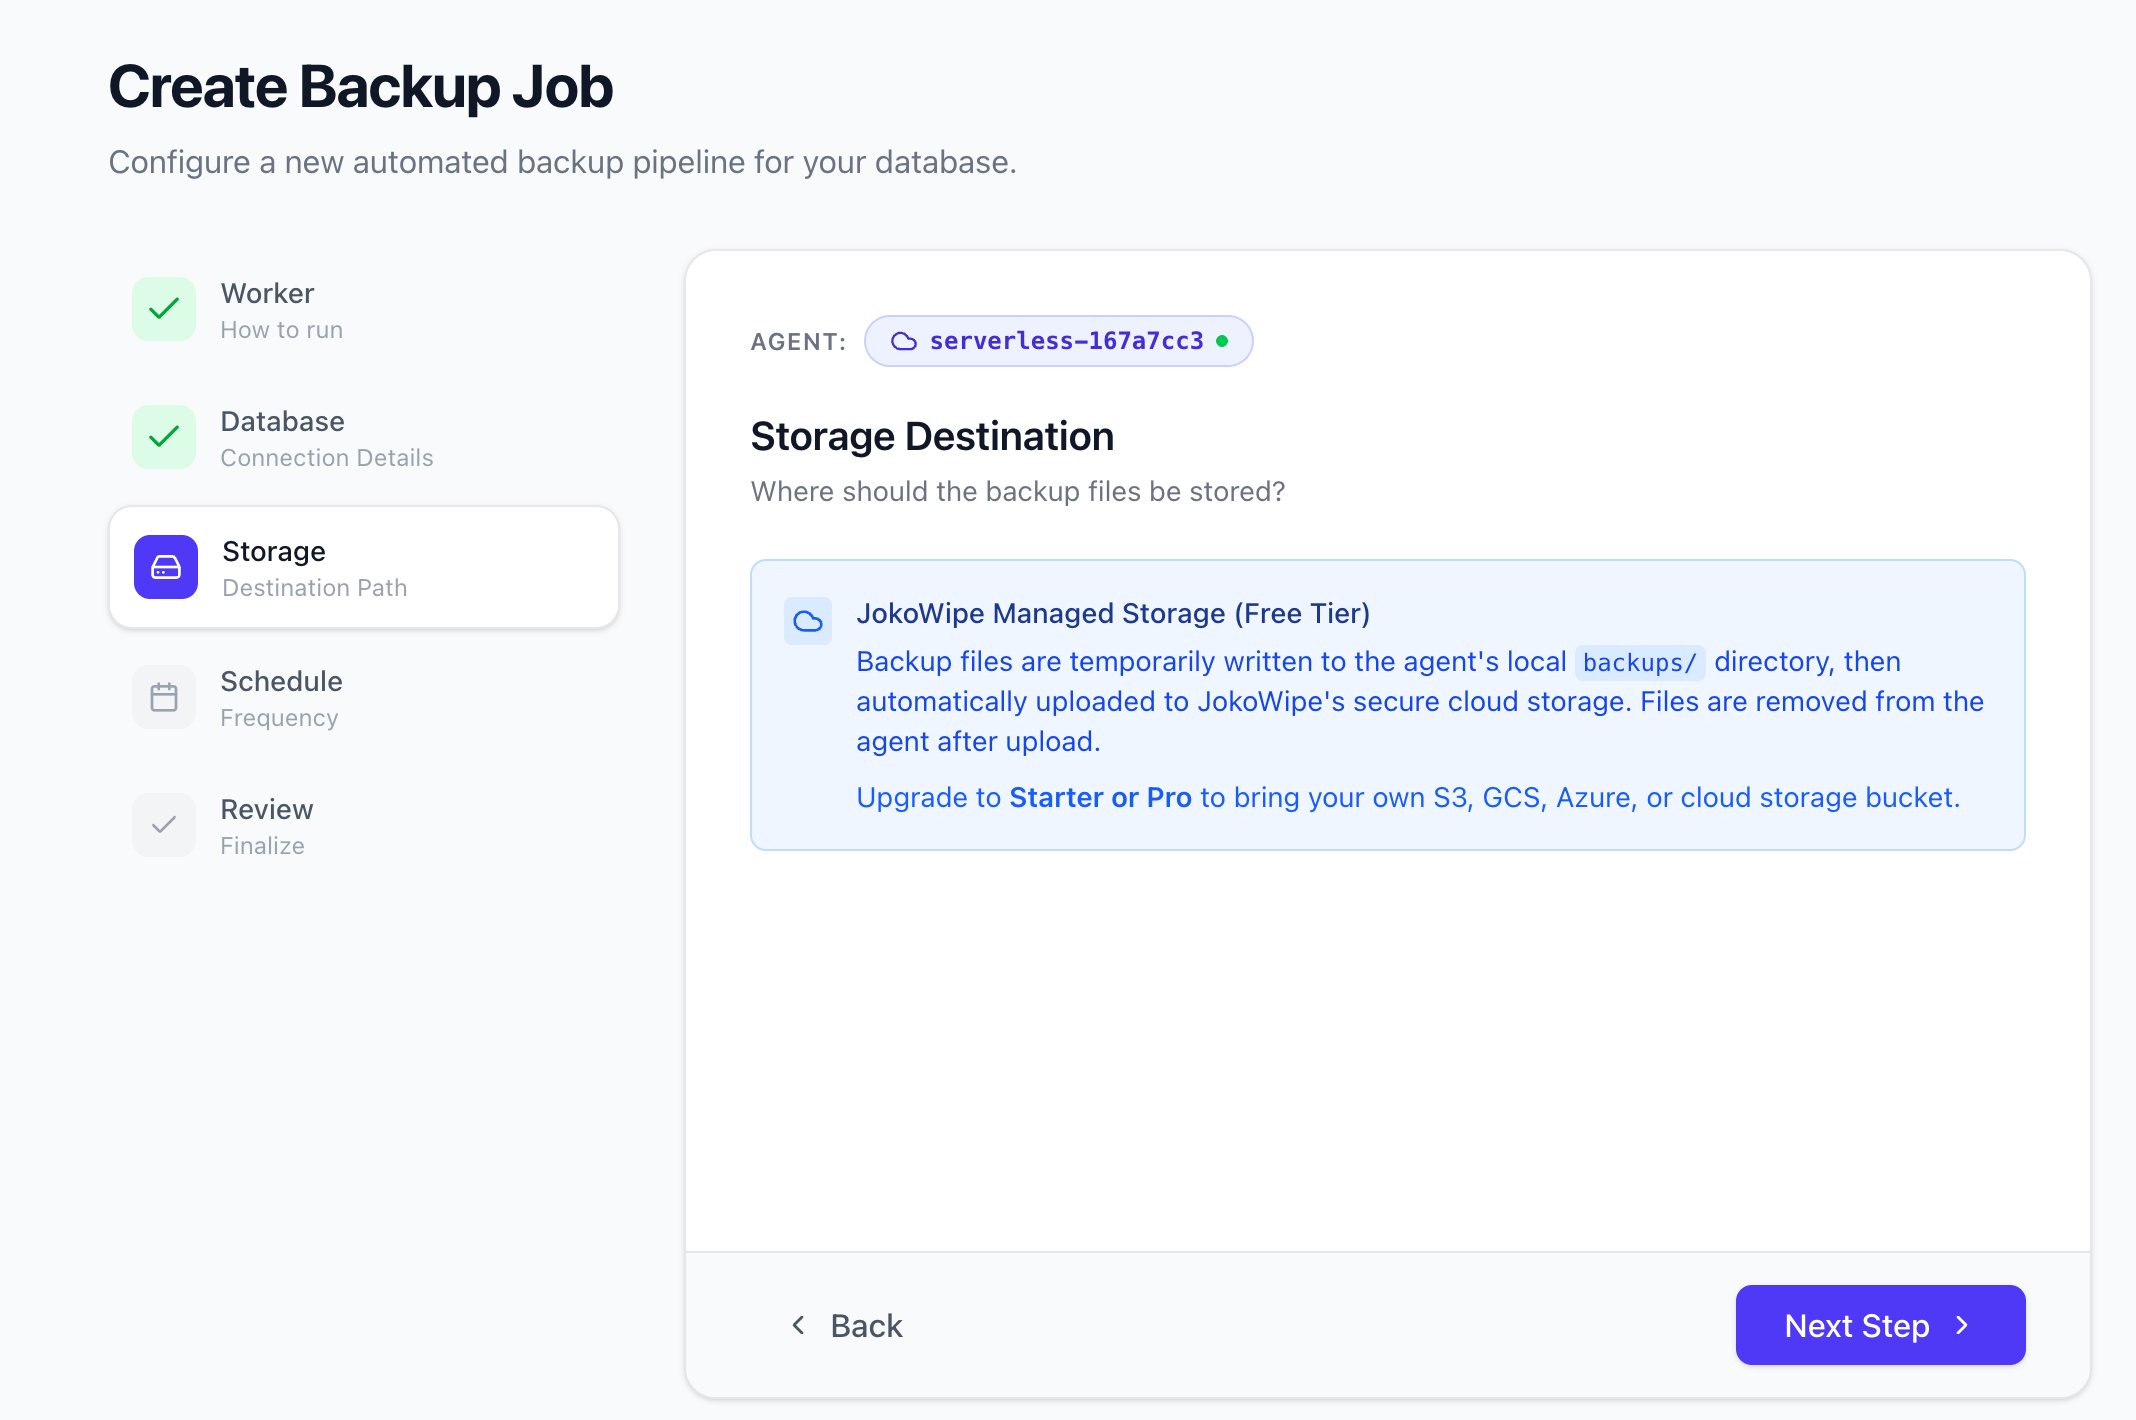
Choose where your backup files should be stored. If you don't have your own cloud storage, select JokoWipe Managed Storage (Free Tier) — backups are written to the agent's local backups/ directory, then automatically uploaded to JokoWipe's secure cloud storage.
💡 Tip: Upgrade to Starter or Pro to bring your own S3, GCS, Azure, or other cloud storage bucket for full control over your backup files.
Step 7: Set Backup Schedule
Configure how often backups should run. Choose from Simple, GFS (Grandfather-Father-Son), or Cron strategies. Set the retention policy — how many copies to keep before older backups are automatically deleted.
You can also set a ZIP Archive Password to protect your backup files with AES-256 encryption.
⚠️ Free plan limits: Minimum schedule interval is 30 minutes, and retention is limited to 96 backup copies. Upgrade to Pro for 15-minute intervals and higher retention.
Step 8: Review & Create Job
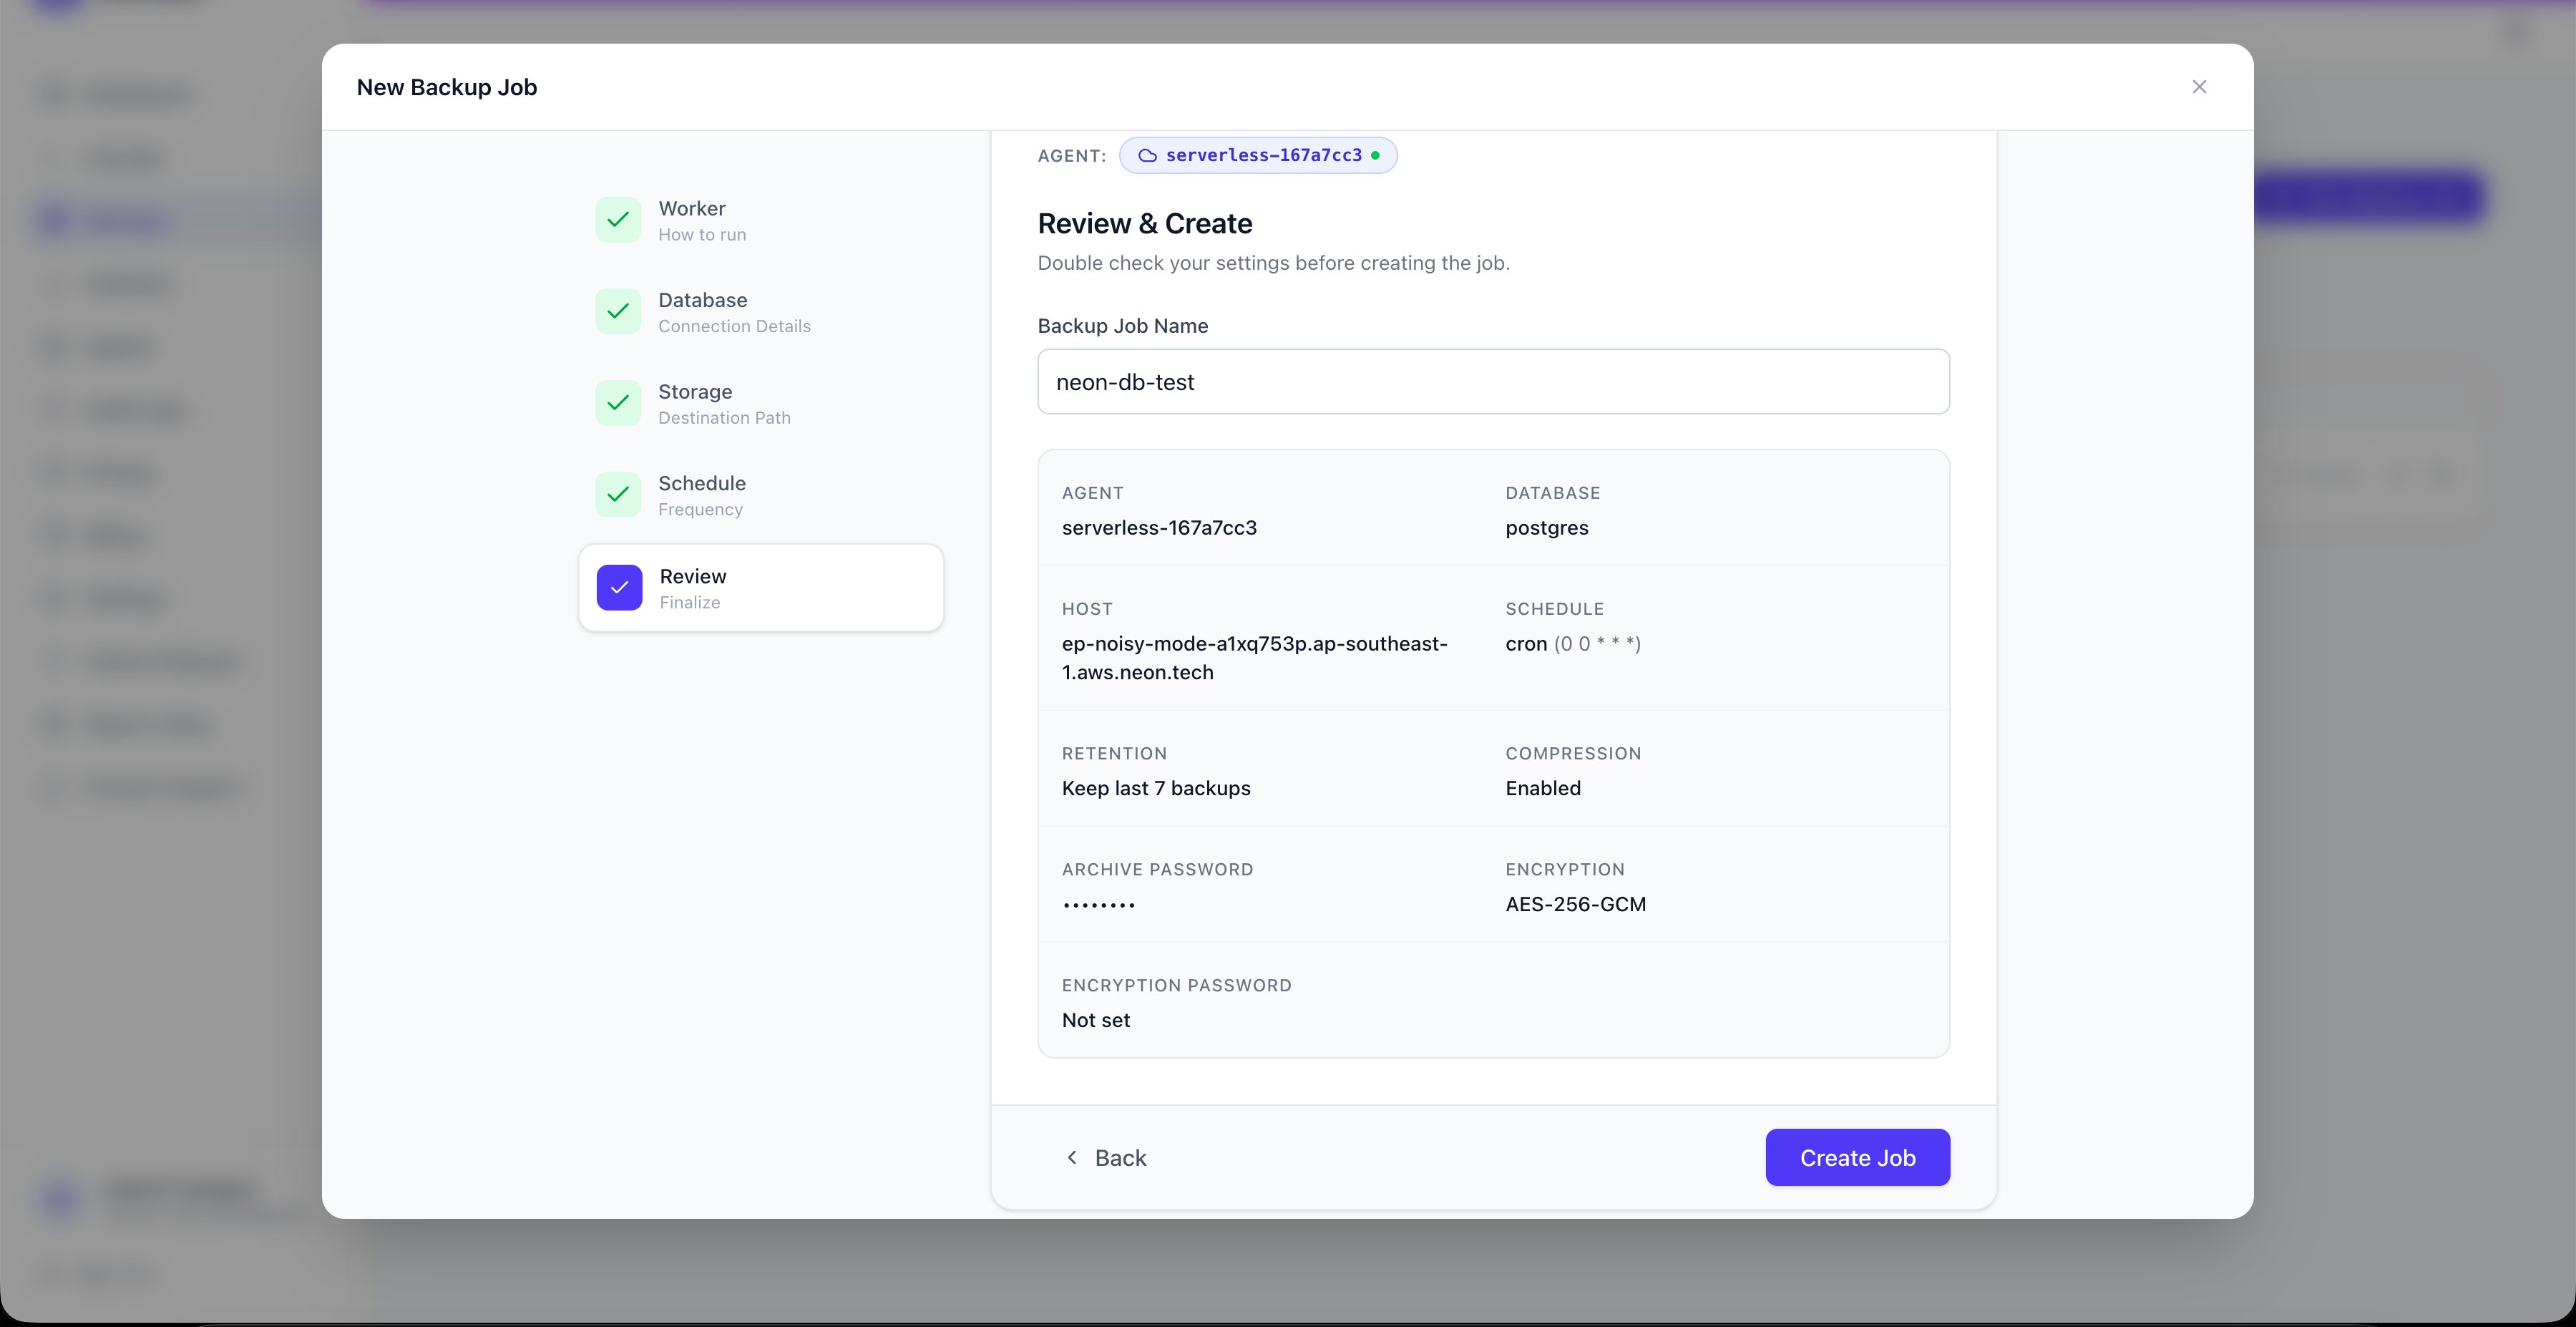
On the Review tab, give your backup job a name (e.g., neon-db-test). Review all your settings — agent, database, host, schedule, retention, compression, and encryption — then click Create Job.
Step 9: Verify Backup Job is Active
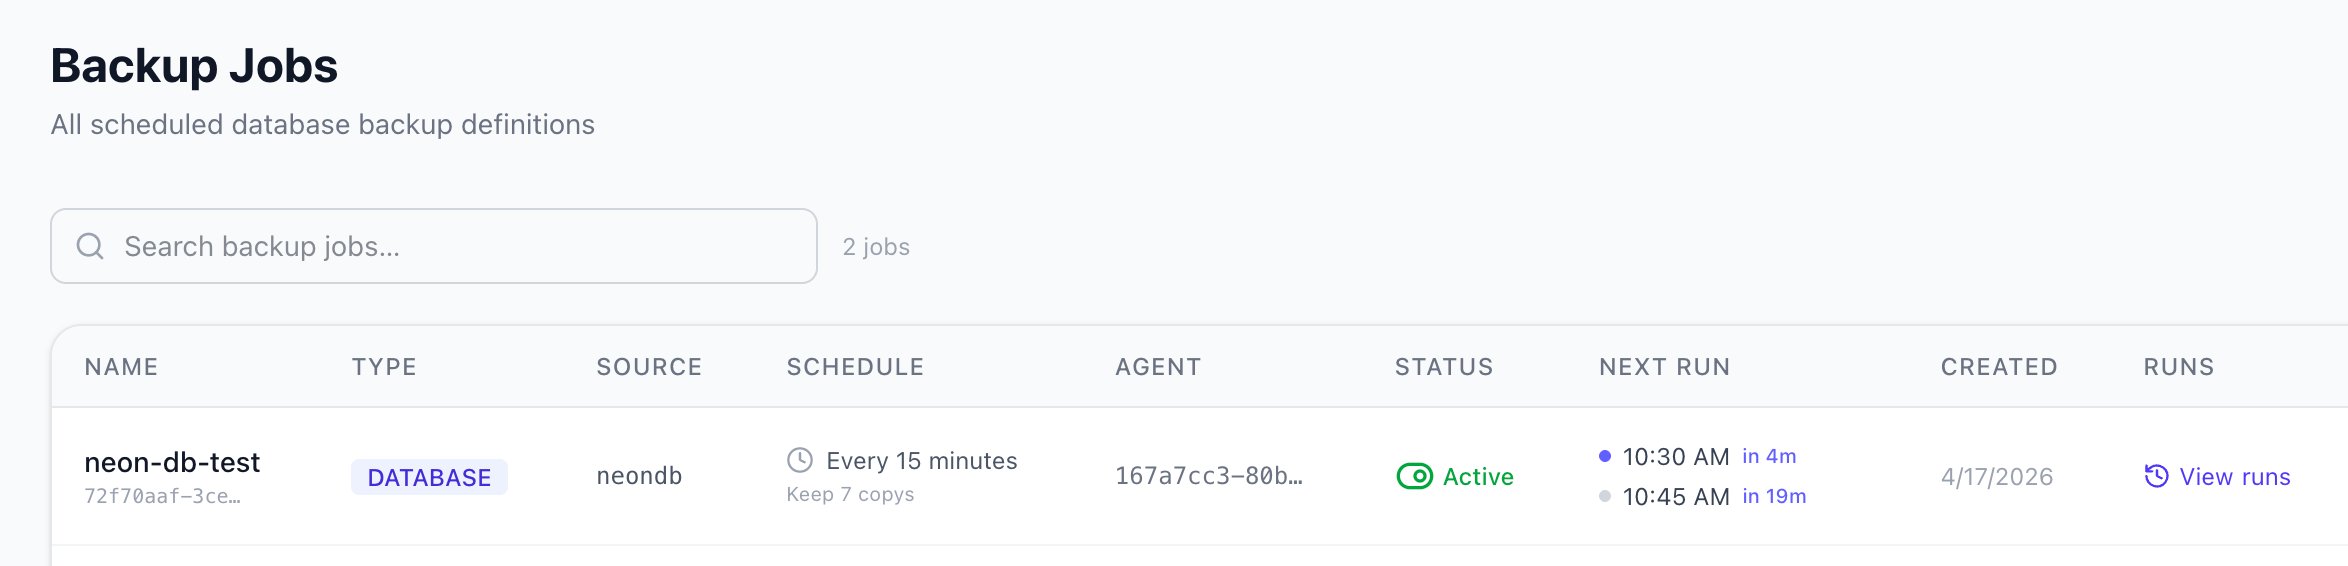
Back on the Backup Jobs page, you'll see your new job listed with an Active status badge and the next scheduled run times displayed.
Step 10: Run Your First Backup
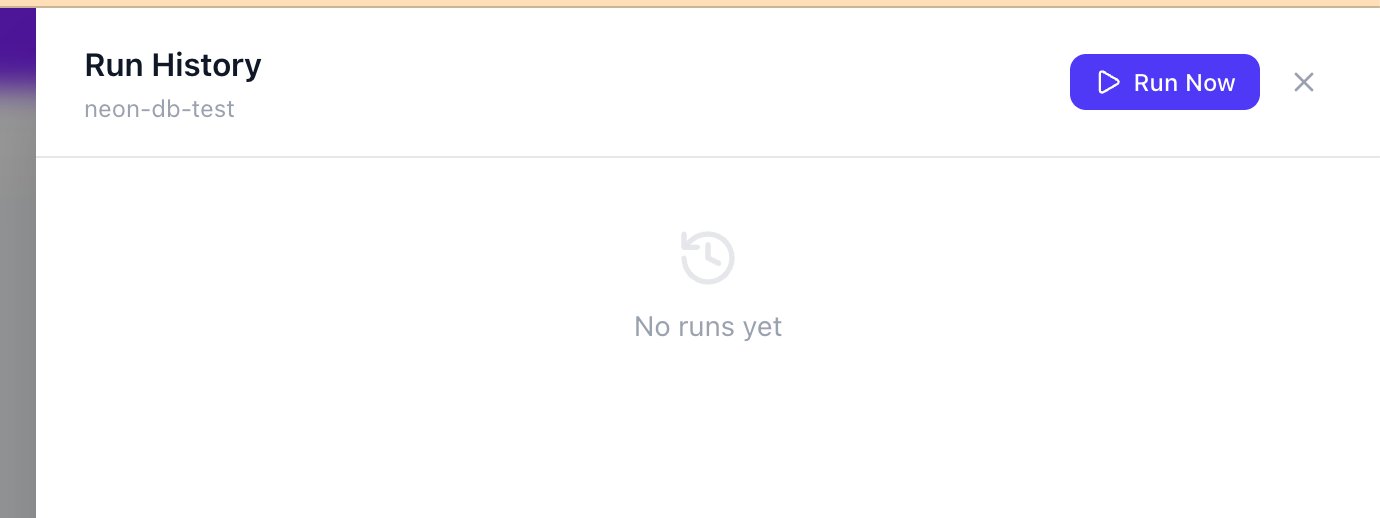
Click View Runs on your backup job, then hit the Run Now button to trigger your first backup manually. You'll see a confirmation message that the backup has been triggered.
Step 11: Monitor in the Console
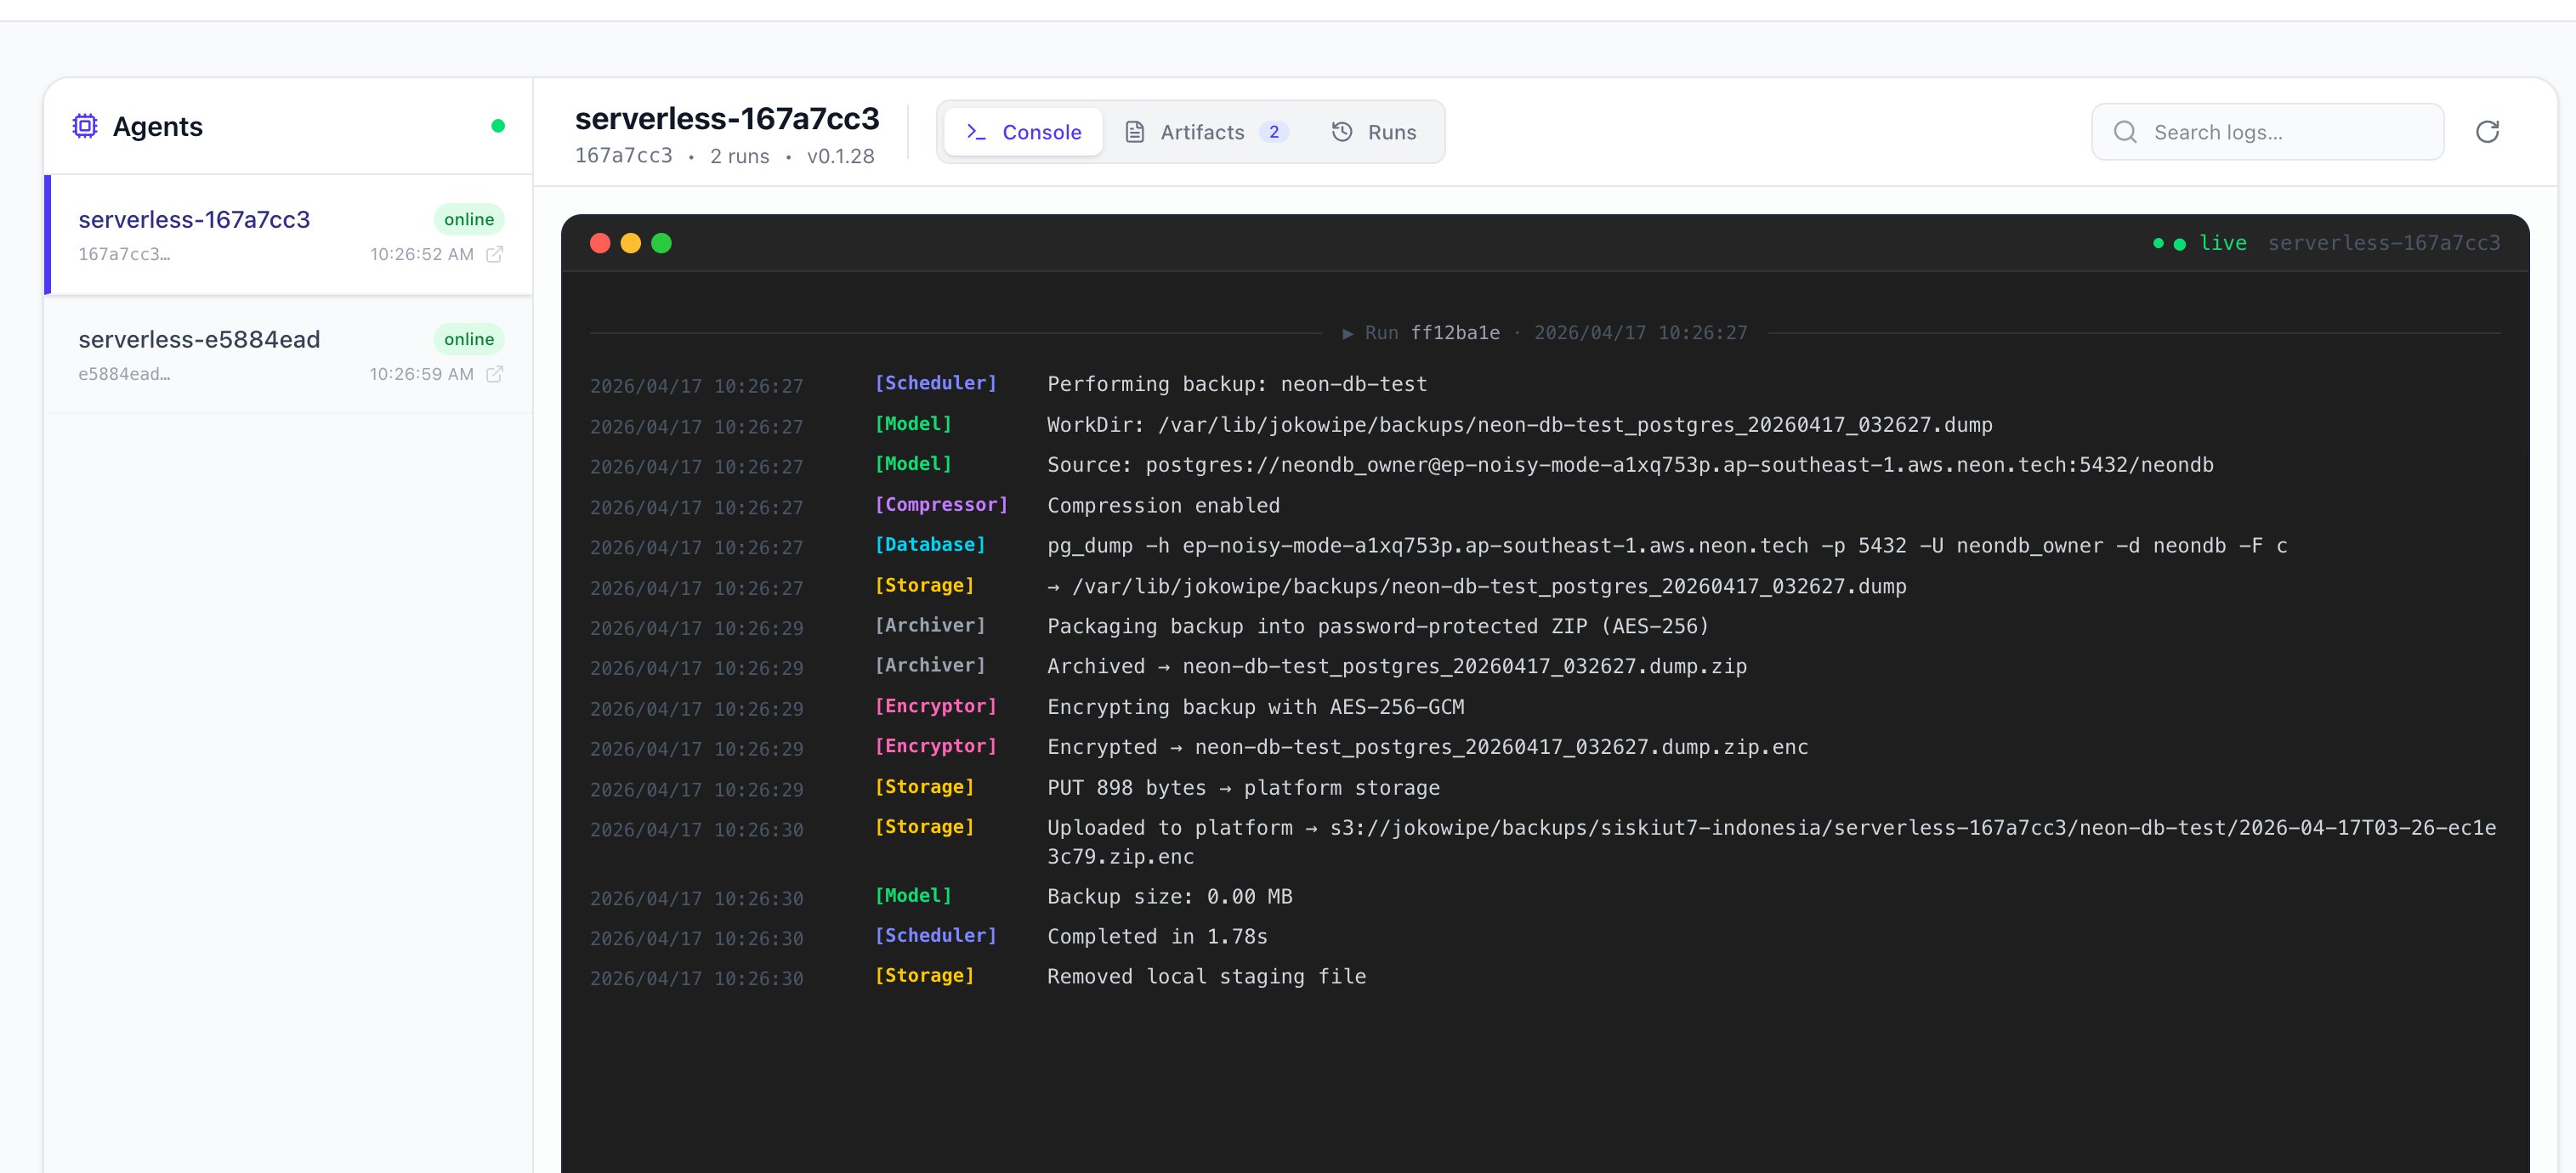
Head to the Dashboard and open your agent's console. If everything is configured correctly, you'll see the full backup pipeline in real-time — from the scheduler trigger, through pg_dump, compression, AES-256 encryption, and finally the upload to platform storage.
✅ [Scheduler] Completed in 1.78s
✅ [Storage] Uploaded to platform → s3://jokowipe/backups/...
✅ [Storage] Removed local staging file
Step 12: View & Download Backup Artifacts
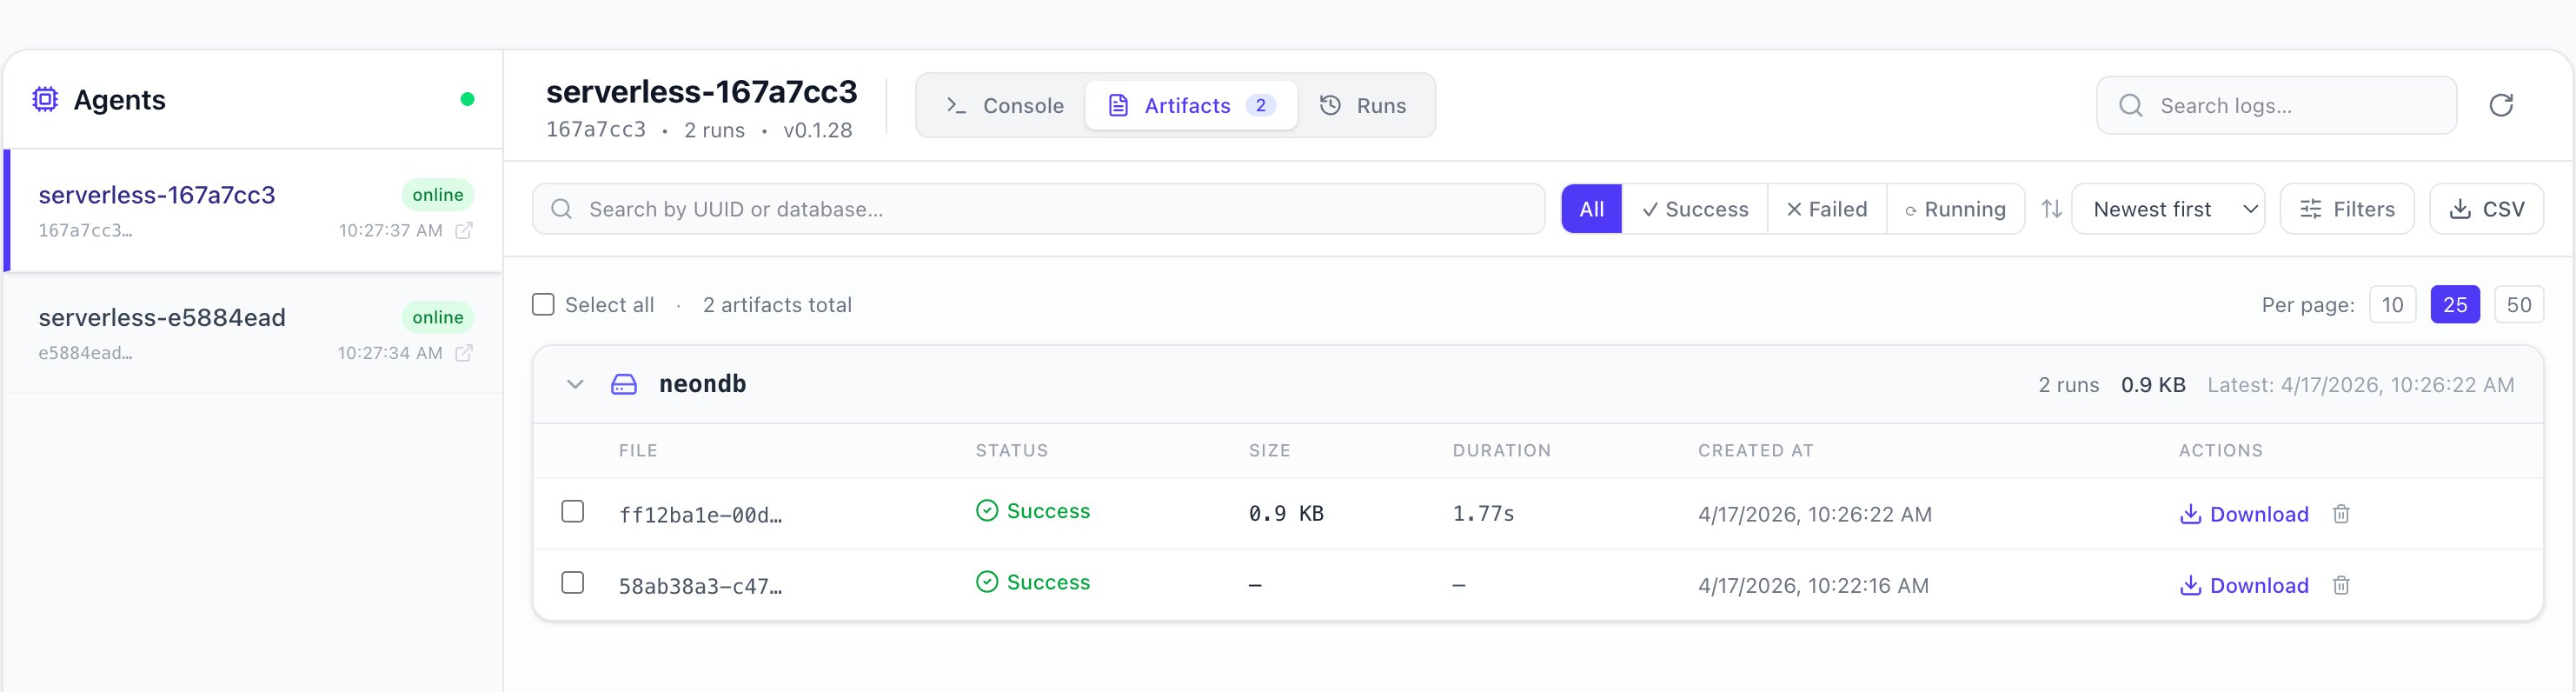
Switch to the Artifacts tab on your agent's page to see a list of all completed backup files. Each entry shows the file status, size, duration, and creation time. You can download individual backups or delete old ones as needed.
🎉 You're all set! Your automated backup schedule is now running. Backups will execute on the schedule you configured, and you can monitor everything from the dashboard.